THE ULTIMATE CAR TRANSITION FIELD GUIDE
THE ULTIMATE
CAR TRANSITION.
FREE + LOCAL VIDEO
Turn a miniature on a train windowsill into a full-size car on the road. A practical MiniMax H3 reference-to-video workflow in ComfyUI.
Start the tutorial ↓BY KAZI AHMED / IMAGES, PROMPTS & STEP-BY-STEP DIRECTION
ONE CAR. TWO SCALES. ONE CONTINUOUS SHOT.
01 / THE WORKFLOW
GET THE FILES.
SET THE STAGE.
Start with an installed ComfyUI and the supplied files in this folder. The video generation runs locally; ChatGPT or Gemini are optional hosted tools for preparing reference images.
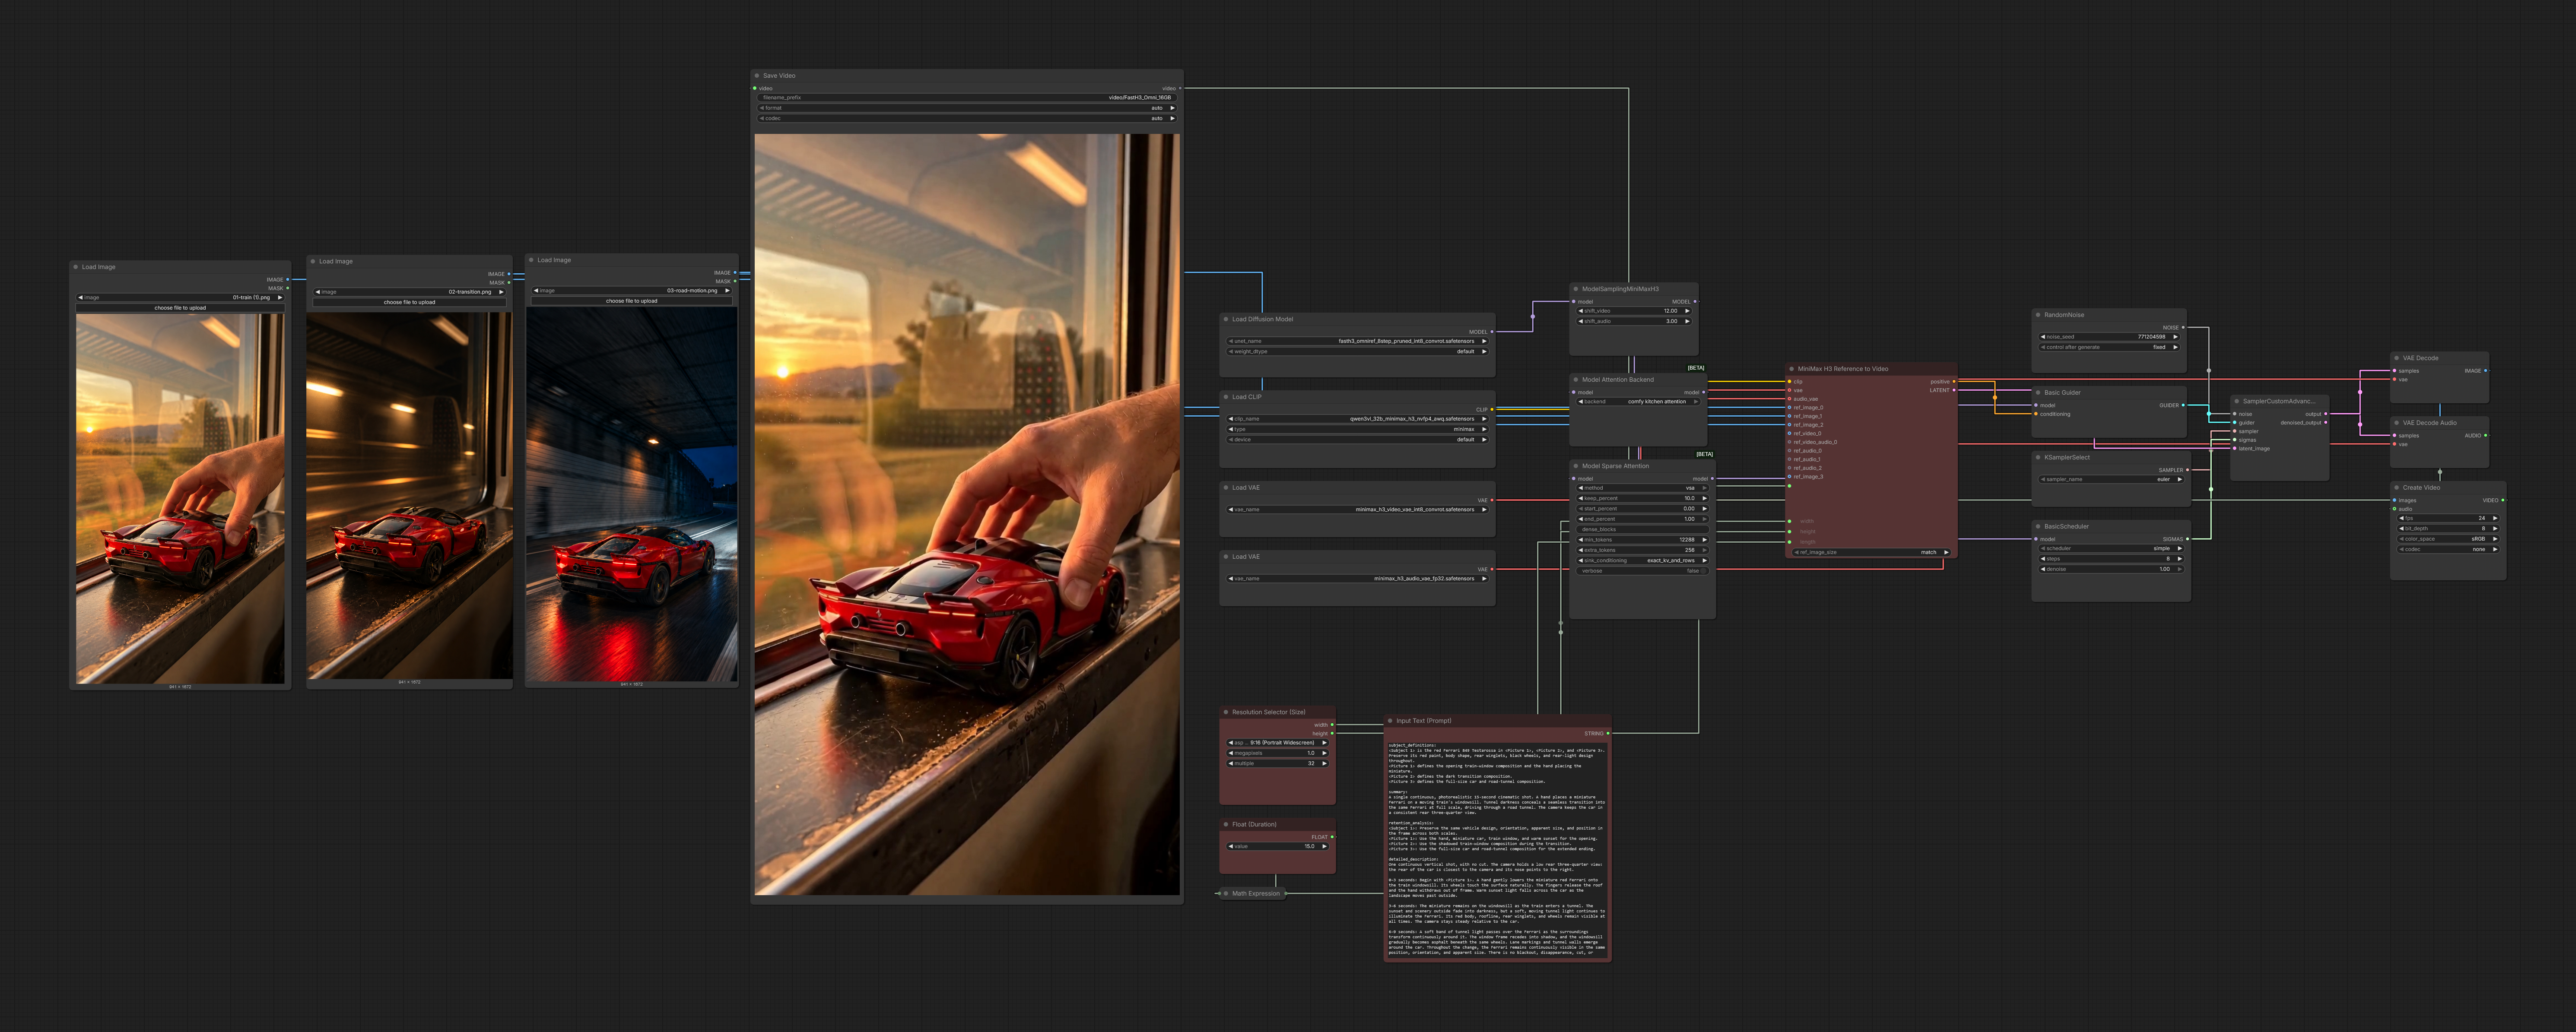
01 / Load the graph
Drag the original workflow PNG from your file manager onto the ComfyUI canvas. Wait for the graph to appear. If it does not load, download the original again and make sure it was not re-encoded.
02 / Install missing nodes
Use ComfyUI Manager's missing-node installer if available, or inspect each missing node's source and install its package. Restart ComfyUI and reload the graph. Update ComfyUI if native H3 nodes are missing.
03 / Download the models
Read each loader in the graph, download its exact model from its trusted source, and put it in the corresponding folder below. Refresh or restart ComfyUI, then select each file in its loader.
04 / Relink and test
Load the three supplied reference images in the order shown below. Check previews and connections, paste the prompt, and run a smaller test before committing to the full render.
Model folders from the supplied graph
ComfyUI/models/diffusion_models/—fasth3_omniref_8step_pruned_int8_convrot.safetensorsComfyUI/models/text_encoders/—qwen3vl_32b_minimax_h3_nvfp4_awq.safetensorsComfyUI/models/vae/—minimax_h3_video_vae_int8_convrot.safetensorsandminimax_h3_audio_vae_fp32.safetensors
The names above are the saved selections, not bundled model downloads. Use the exact dependencies required by your installed graph. See ComfyUI’s H3 documentation for the native components; this graph uses a FastH3 model, so do not substitute a different model without checking compatibility.
02 / THE REFERENCES
ONE CAR.
THREE MOMENTS.
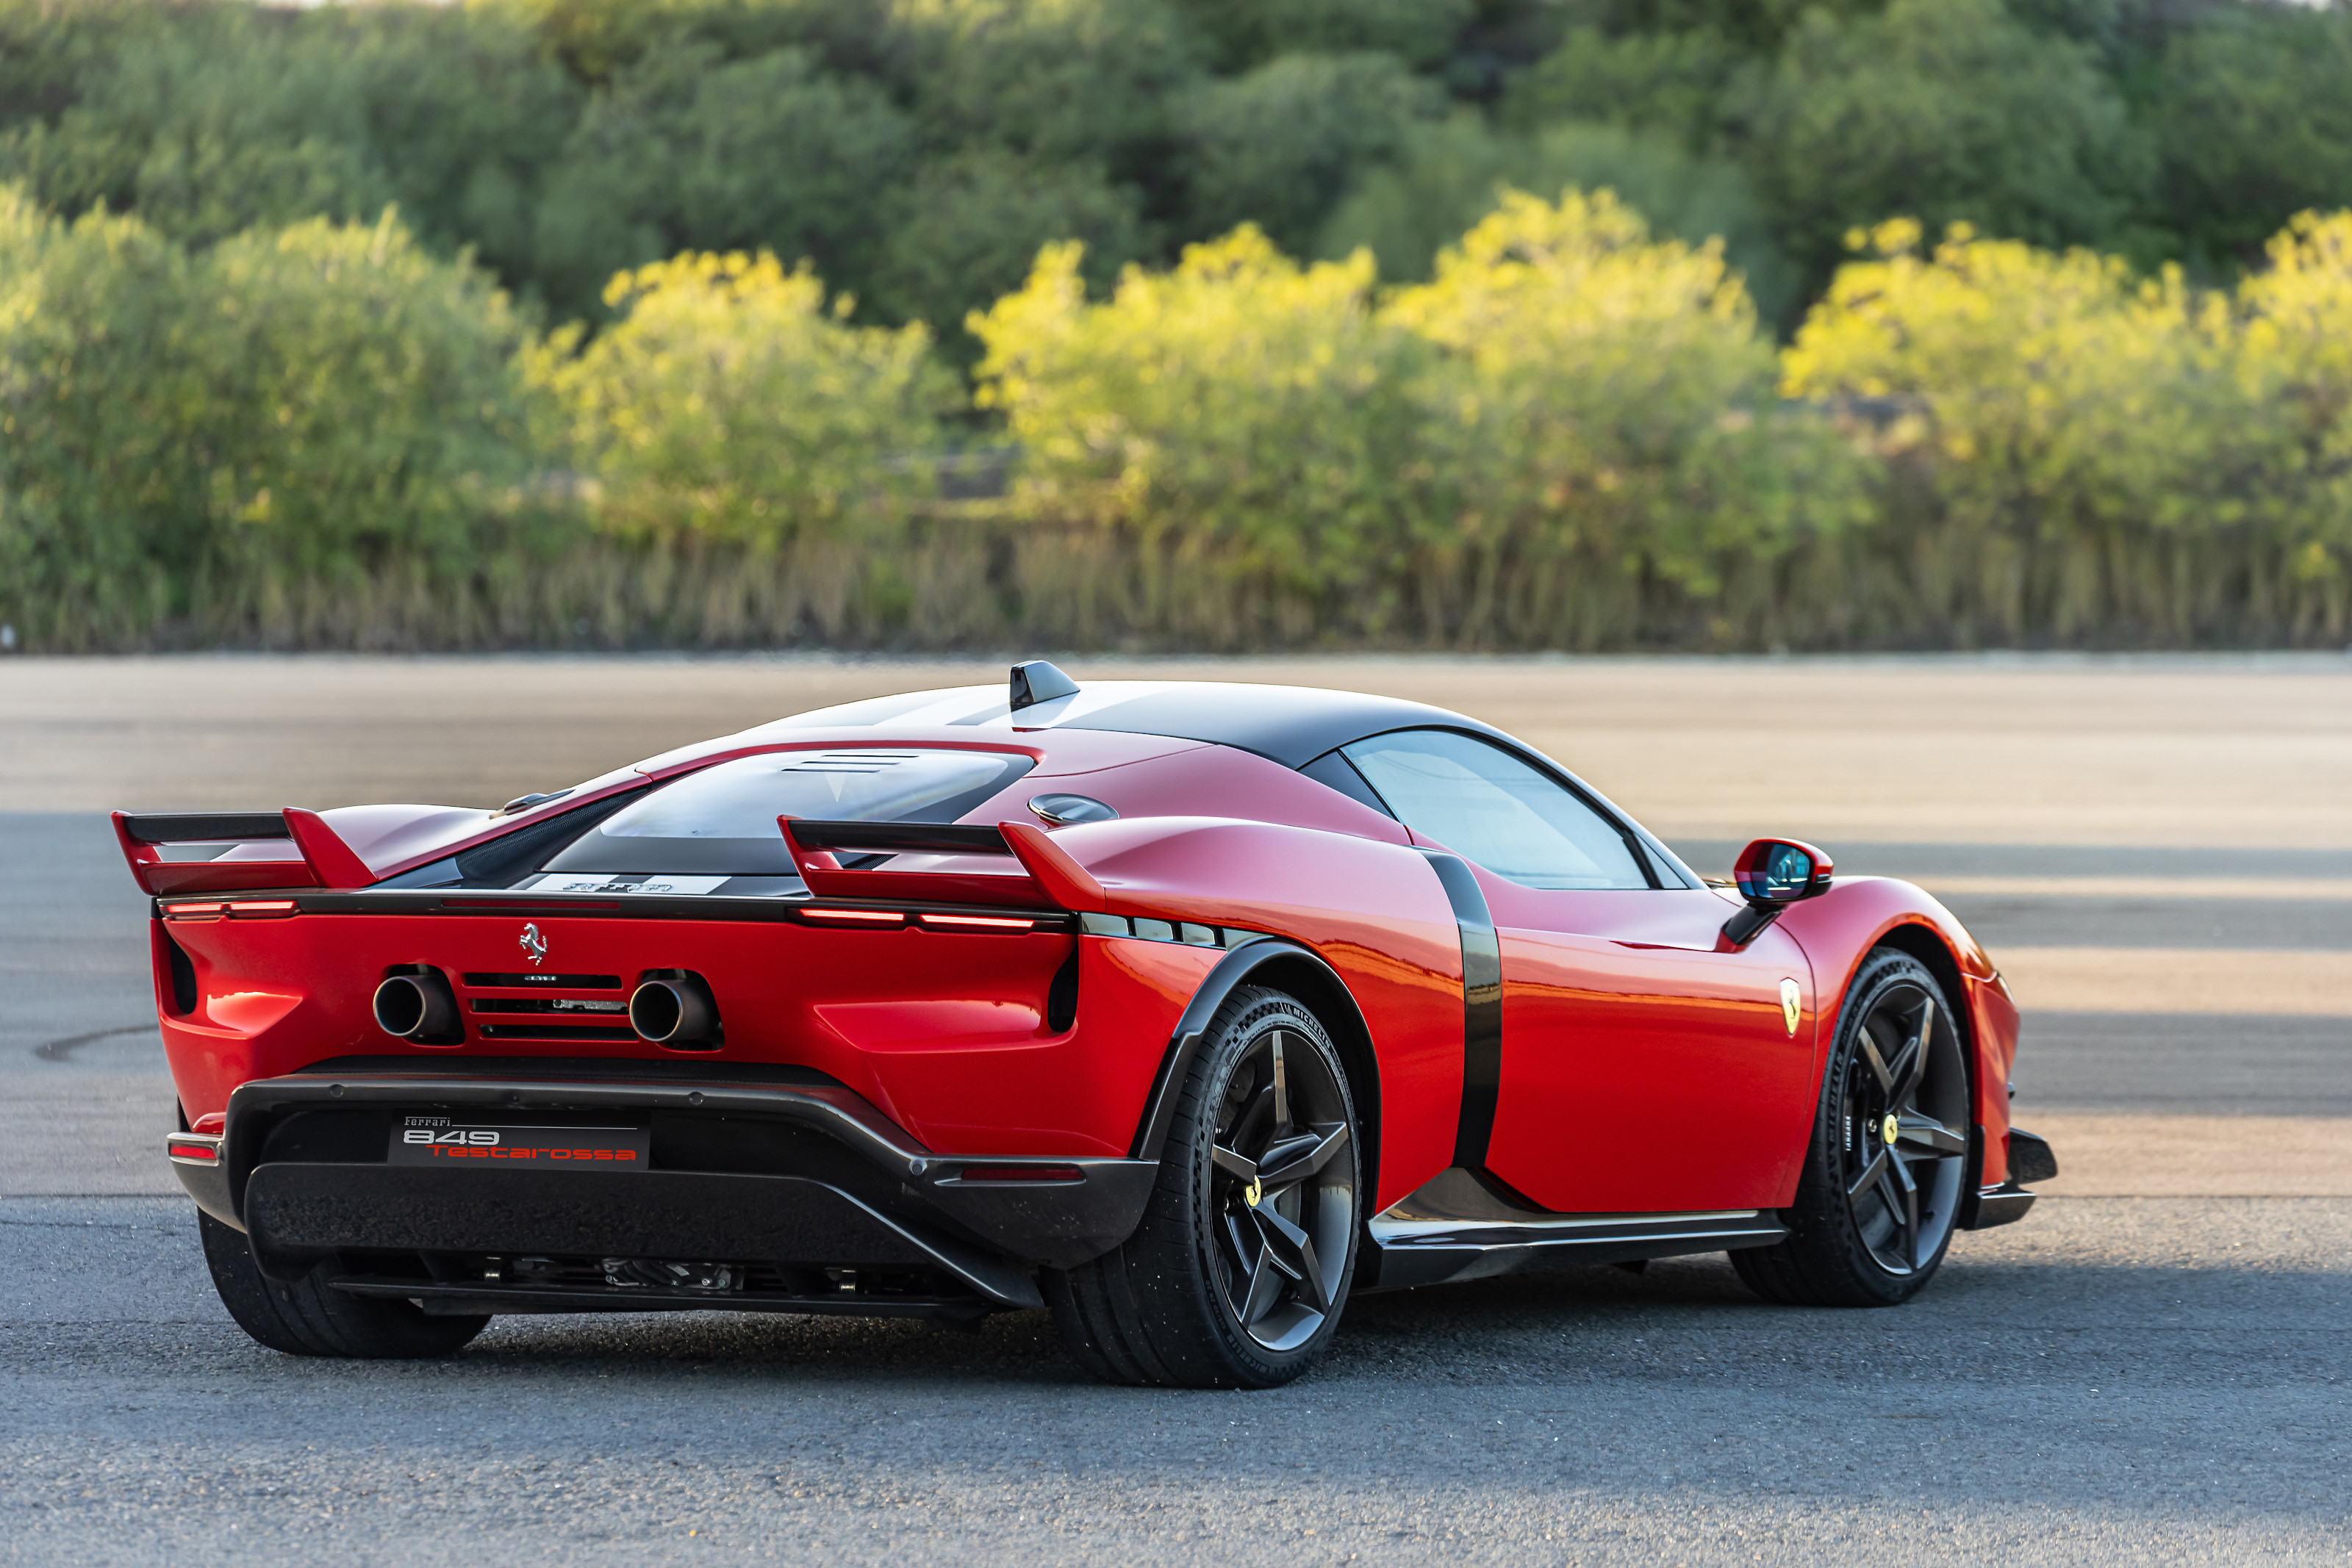
Use the supplied Ferrari reference or choose any car. Select a clear rear three-quarter photo and use it as the visual authority for all three scenes. The rear points toward the camera on the left; the nose points right. Consistent position, angle and apparent size make the transformation easier to follow.
Download the Ferrari reference ↓
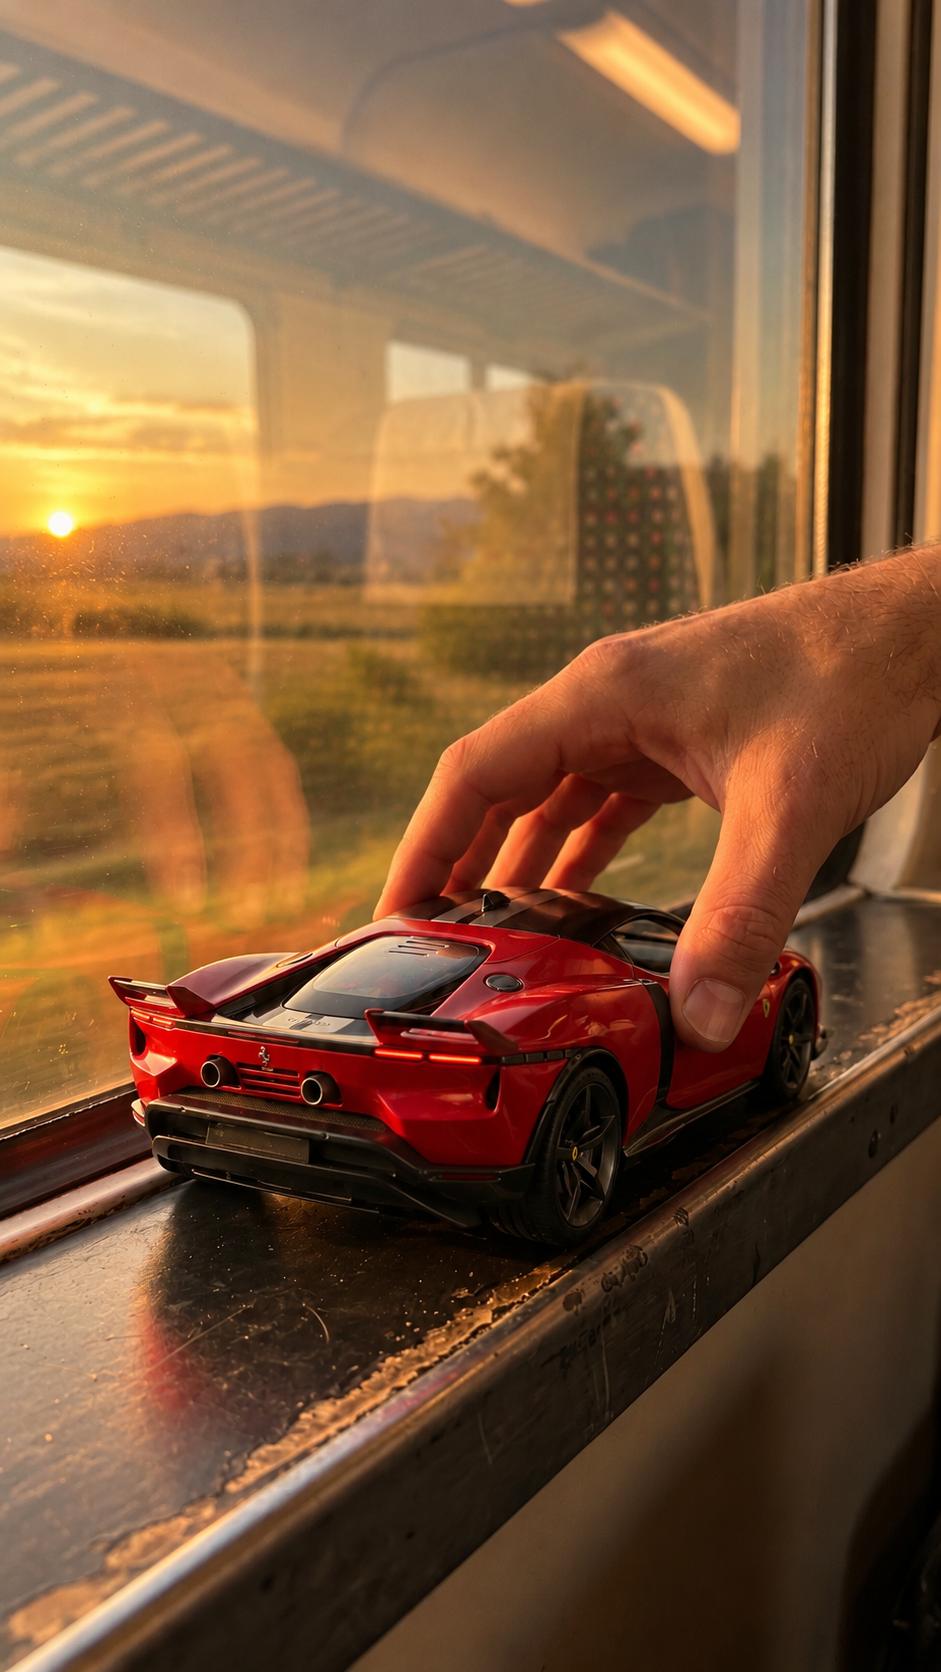
01 / The opening
A hand finishes placing the miniature on the train windowsill in warm sunset light.
Download image ↓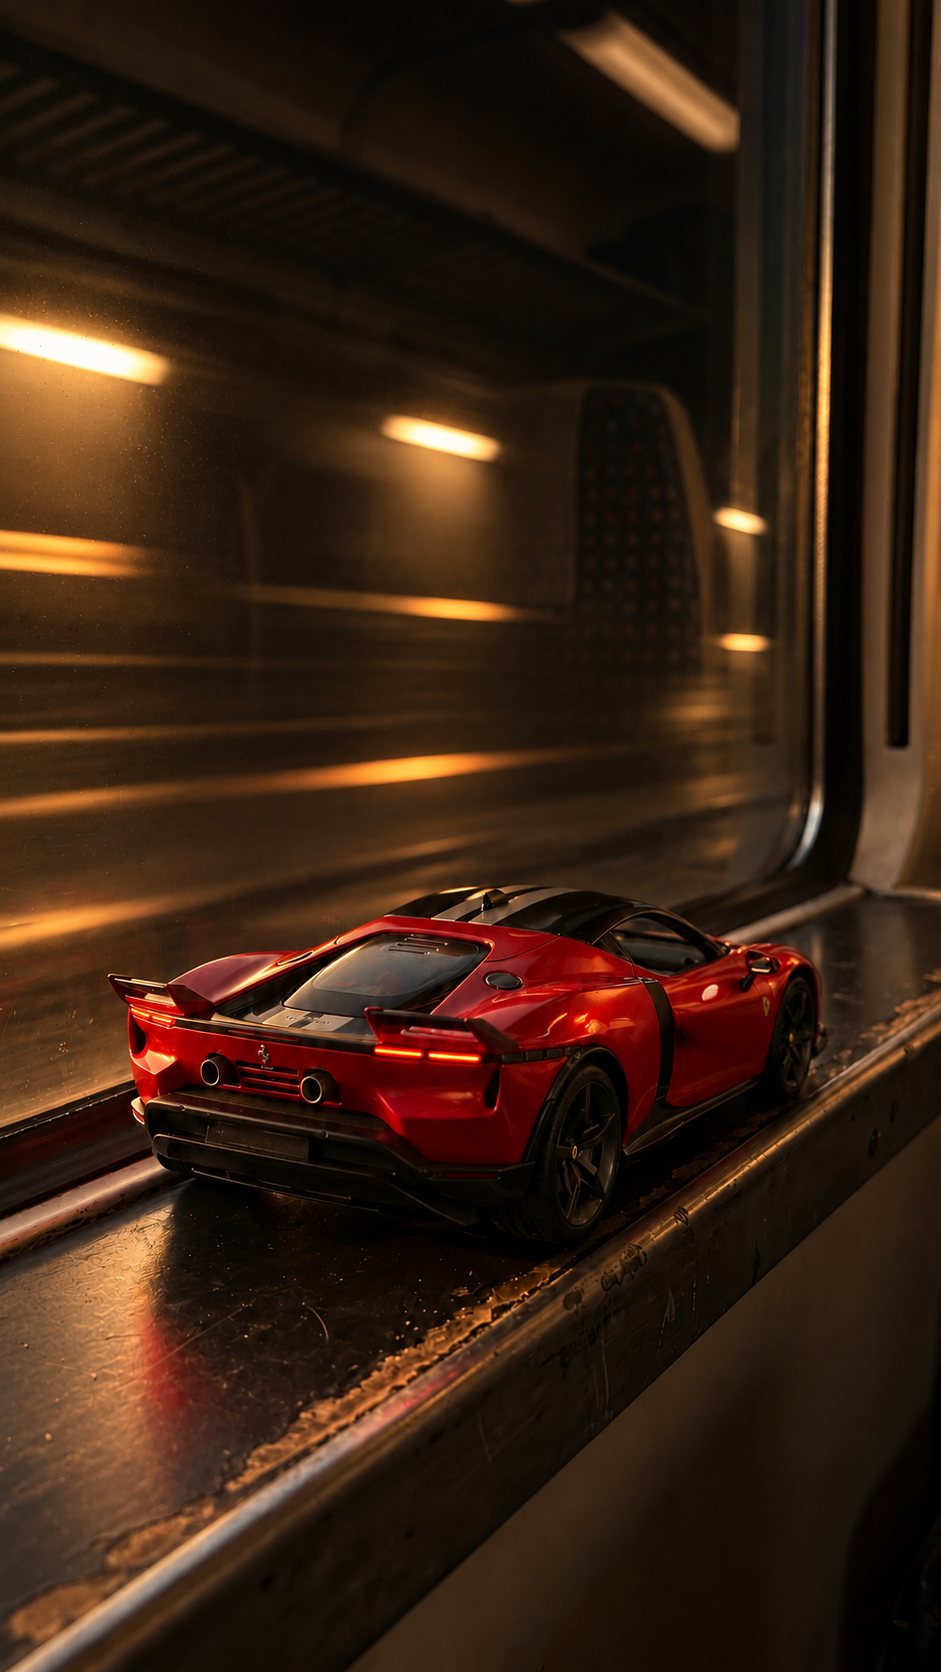
02 / The bridge
The train enters a tunnel. Keep the car lit enough to see its silhouette and wheels.
Download image ↓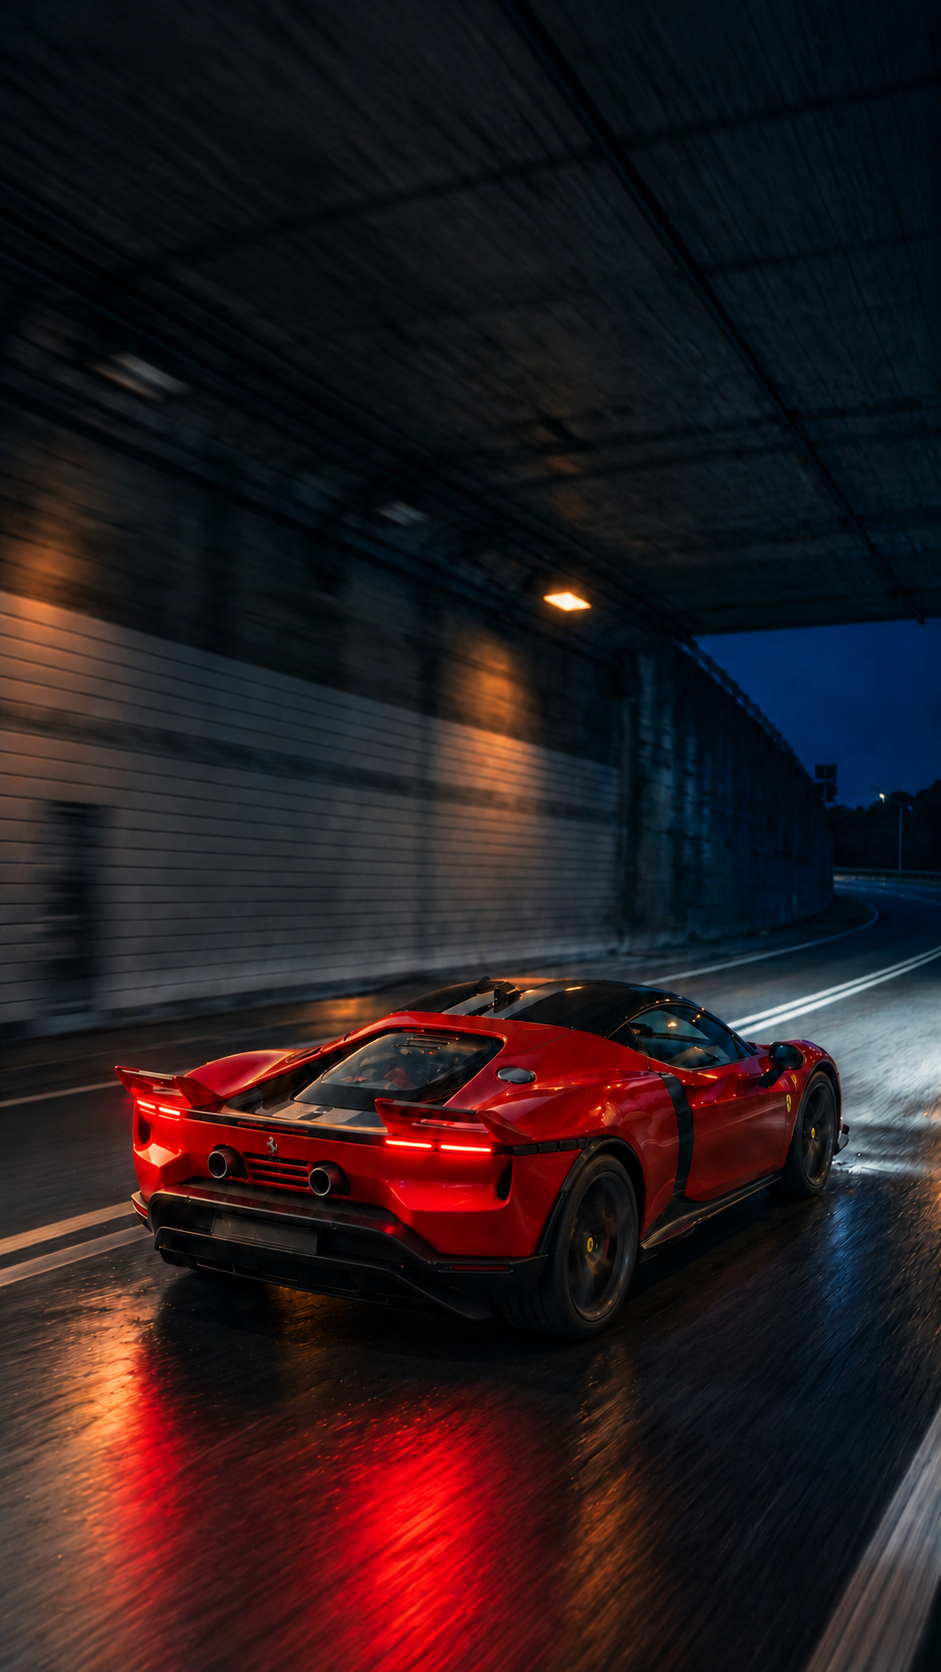
03 / The reveal
The full-size car drives through a road tunnel, matched to the earlier framing.
Download image ↓Make your own references
Upload your chosen car photo to ChatGPT or Gemini and ask for an image edit using an available image generator such as Nano Banana. Alternatively, use ComfyUI with an image-editing model such as Qwen Image Edit, if installed. Use the same car photo for all three; for scenes 2 and 3 also provide the approved scene 1 as a framing reference if the model supports multiple images. Set a portrait 9:16 canvas in the generator. Availability and model capabilities vary.
Generate scene 1 first. Compare roofline, rear lights, wheels and contact points across subsequent results. Regenerate if the car shifts or changes shape. The provided road image is close, but not perfectly aligned; it may move vertically during generation.
Copy the three image prompts ↓
01 / Opening
02 / Transition
03 / Road
03 / THE ANIMATION
KEEP THE CAR.
CHANGE THE WORLD.
Load 01-train.png, 02-transition.png and 03-road-motion.png in that order. The R2V node receives them as <Picture 1>, <Picture 2> and <Picture 3>. These are references, not guaranteed timed keyframes.
The supplied graph saves a 15-second target, portrait selector, 24 fps, an 8-step simple schedule and fixed seed. The duration expression snaps the frame count to its supported grid, so inspect the exported result. Set 1080 × 1920 only if your graph supports it, and check the actual output dimensions: the screenshot's selector does not by itself prove a particular final size. Kazi's run on an RTX 5070 Ti was reported at 1080 × 1920, about 45 seconds per iteration and 8–9 minutes total; hardware and settings affect performance.
Copy the video prompt
Why this direction works
The reference definitions give each image a job. The retention section identifies what must stay constant. The timeline separates hand action, entering the tunnel, the environmental change and the longer driving shot. Passing light keeps the car readable while the setting changes. Sound supports the shift from train to road.
04 / TROUBLESHOOTING
FIX THE RELATIONSHIP.
KEEP WHAT WORKS.
The frame goes black
Brighten the car in the transition reference while leaving the surroundings dark. Repeat that the car stays visible, and remove instructions that say darkness hides the whole change.
The car jumps or changes shape
Compare the roof, wheel centers and rear lights in all three images at the same aspect ratio. Rework the mismatched reference using the opening as your composition guide. Keep the same seed while testing one change at a time.
The hand looks strange
Start with a hand already touching the model and ask it to finish placing and release it. Make a shorter hand-action test, then return to the full timeline.
Out of memory or slow generation
Try a smaller supported resolution or shorter test, close other GPU-heavy apps, and check the graph's model and attention settings. Increase the output only after the shot works.
References appear at the wrong time
R2V references guide the model; they are not hard timeline anchors. Clarify each role and timing, or try a compatible first/last-frame workflow if endpoint control is more important. Verify the installed graph before using guide nodes.
YOUR NEXT SCENE STARTS HERE
SMALL ACTION.
BIG CINEMA.
Choose a car. Match the frames. Let the world change around it.
Back to the workflow ↑